

large bath towel, hand towel (both on clearance) cute flannel fabric (half off)...

cut the hand towel in half, cut a section of flannel about 1/2 inch bigger than hand towel...

fold fabric in half...

sew a seam across one short end...

sew a seam down the cut end of the hand towel...

turn the hand towel right side out (the sewn seam inside) put the fabric inside the hand towel hood...
 turn up the fabric and pin all the way around (except the bottom!)...

sew a top stitch 1/8th of an inch from edge of fabric... make sure you don't sew the last 1/2 inch or so of both edges... or if you do like i did rip your stitches out! (see below for picture)

see, this is the part you shouldn't sew... instead fold over and under to "mieder" the corner... did i just make that up?

fold raw edge of fabric under edge of towel and pin... make sure to pin to center of bath towel, too!


once pinned sew a straight stitch across hand towel...

pin ironed over edge to edge of towel, you should have about 1 inch hang over on each end... 
turn towel over, iron down other side of fabric... 
fold fabric over edge of towel and pin... when you get to the end fold excess fabric over... 

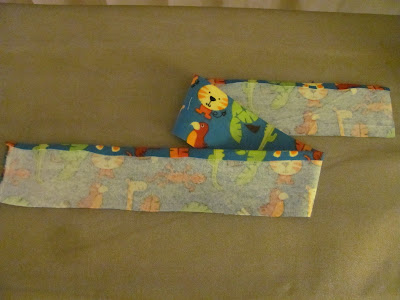
next cut two sections of fabric about two inches longer than the edges of the bath towel, and as wide as you would like... the strips for this towel were about 3 inches wide... for the second towel i made they were about 5 inches...
iron over the edge...

pin ironed over edge to edge of towel, you should have about 1 inch hang over on each end...
sew with a straight stitch...

turn towel over, iron down other side of fabric...

fold fabric over edge of towel and pin... when you get to the end fold excess fabric over...

then fold fabric over to "mieder" the corner...


sew a straight stitch all the way around the edge of the fabric...


and there you have it...

for the second towel i gave the hood a rounded edge instead of a point... after cutting the hand towel in half and cutting the fabric, i folded the hand towel in half and marked it with a rounded edge on the fold...


these are pretty big towels and the hood is good size, so boy shouldn't outgrow them any time soon...

for the second towel i gave the hood a rounded edge instead of a point... after cutting the hand towel in half and cutting the fabric, i folded the hand towel in half and marked it with a rounded edge on the fold...

then cut it and the fabric (also folded in half)...

these are pretty big towels and the hood is good size, so boy shouldn't outgrow them any time soon...


